Top 10 Myths About Moisture Mitigation


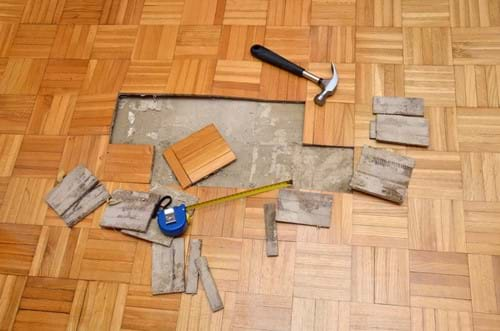
As flooring professionals know, moisture is the enemy that can ruin an otherwise flawless installation. Excessive moisture vapor emission rates are the cause of many failures in both hard and soft floor surfaces, leading to issues such as warping, buckling, adhesive degradation, mold growth and more.
And the results of these failures are costly interventions, with estimates suggesting that North American property owners spend $2.4 billion addressing moisture-related flooring failures each year.
How do you avoid these costly failures and ensure the satisfaction of your customers? The answer is moisture mitigation. Moisture mitigation systems protect flooring and provide end-customers peace of mind. But in today’s construction industry, where cost and speed of install are critical considerations, how realistic is using a moisture mitigation process?
Let’s explore some of the common myths and misconceptions that may be discouraging you from using moisture mitigation in your projects.
1. Mitigating is expensive and it is way too hard to convince customers of its value.
All contractors will be familiar with the price-sensitive customer who wants to both drive a hard bargain and receive quality craftsmanship. Such customers may be resistant to adding another line to the budget and question the value of moisture mitigation.
However, customers may not realize the extent of the damage that excessive moisture vapor emission rates can lead to. A frank conversation about what can and will occur without moisture mitigation can often convince a customer that it is clearly the best option.
One way to make the requirements of the job clear for a customer is to use our pre-mitigation checklist. This checklist includes steps such as moisture testing and space to record the general conditions of the floor, such as slab thickness, flatness and roughness, and construction joints and joint conditions. Seeing the conditions mapped out in writing can help a customer better understand the scope of the work — and help you to sell surface prep and moisture mitigation to them.
With hesitant customers, we recommend asking them to consider whether they can afford to tear out and replace their flooring due to moisture damage … and questioning them about how costly it would be to close their business to fix the issues caused by avoiding mitigation. This can help clarify and quantify the clear cost-benefits of moisture mitigation.
2. Epoxy is the only answer for moisture mitigation.
Epoxy is the traditional solution for moisture mitigation. TEC’s LiquiDam™ is a low viscosity, high-penetrating two-part 100% solids epoxy. However, new technology offers alternative products, including our LiquiDam EZ™.
This innovative product is a one-component moisture vapor barrier that doesn’t require mixing. This water-based product meets the epoxy performance standard, ASTM E96, with a permeability of fewer than 0.1 perms. Additionally, EZ can be resealed in partial pails, stored and used for up to 6-months, contributing to a low waste solution.
Both of these products have a low VOC and can contribute to LEED® points. They are also both backed by TEC’s 10-year product guarantee.
3. The tight construction schedule does not allow time for moisture mitigation.
TEC has designed our moisture mitigation systems specifically with contractors working on challenging and compressed schedules in mind. Both LiquiDam and LiquiDam EZ are designed to offer streamlined installation timelines to keep your projects on track.
LiquiDam™ can be directly applied to green concrete up to 100% RH and cures within 4-5 hours for same-day flooring installation. Only one coat is needed to achieve desired results. Full strength multipurpose primer is needed before the application of surface preparation products.
LiquiDam EZ™ can also be directly applied to green concrete up to 100% RH. Two coats are required to fully protect the substrate: each coat dries in approximately 90-minutes, depending on environmental conditions. Once dry, the product doesn’t require primer before the application of surface preparation products.
These fast dry times allow for same-day flooring installation, perfect for projects where time is of the essence.
4. Grinding or shot blasting is always required before applying moisture mitigation.
With LiquiDam and LiquiDam EZ, surface profiling may not be necessary if the surface is clear of contaminants. You can test the surface with a knife: If it produces a fine powder, grinding or shot blasting will be required.
However, if your surface does not produce any powder, and your floor is contaminate-free, you can proceed to apply LiquiDam or LiquiDam EZ. Both products can also go directly over burnished concrete.
5. Waterproofing and moisture mitigation products are the same and address the same issue.
Waterproofing and moisture mitigation are sometimes used interchangeably, causing confusion for customers. However, these products are not the same, and waterproofing is not a substitute for proper moisture mitigation.
Waterproofing products are designed to protect substrates from liquid water coming from above the waterproofing membrane. A typical use case would be when installing a shower, for example.
In contrast, moisture mitigation products protect the flooring from water vapor coming up from underneath the flooring, such as in slab on grade construction. Different products, different uses.
6. Moisture mitigation is never needed in dry climates.
If you’re working in a dry climate, customers may assume that they don’t need to worry about moisture mitigation. However, moisture has many ways of damaging a floor.
For example, when a slab is initially poured, only about half the water is needed for the concrete to cure properly. The rest of the water must leave the slab via evaporation, which can affect flooring in all climates.
Also, regardless of climate, at some depth beneath the slab, there will be a water table where moisture vapor can rise from and affect the slab. This problem is especially prevalent in older slabs without an intact plastic moisture vapor retarder.
Your ability to provide accurate and honest assessments of the risks of moisture damage can help you become a trusted partner to your clients and position you as an expert they’ll be happy to recommend on future projects.
7. Moisture mitigation can go above the self-leveler or patch, no problem.
Moisture mitigation systems are designed to prevent moisture in the concrete from affecting the flooring. In order to be effective, moisture mitigation products need to be applied to the bare concrete, before patches or levelers are installed. Learn more about how to ensure a successful self-leveling underlayment application here.
8. Partnering with one manufacturer for moisture mitigation, surface preparation and adhesive needs isn’t really that beneficial.
When determining what products to use for a job, look for a manufacturer who backs up their products with warranties. Each standalone product will often carry warranties from one to ten years — but when a full system of moisture mitigation, surface preparation and adhesives are installed from the same manufacturer, the warranty could be twenty-five years or more.
We’re proud to partner with contractors who know the value of a job done right. And we’re always happy to help you consider the right solutions for your job, help you to cut down on labor costs and to show you products that can make a difference in your work. We hope that if you choose us as your partner, you’ll see real value in the cost and time savings we can help you find.
9. Using moisture mitigation underneath a tile installation is a total waste of money.
Tile can’t be damaged by water, right? After all, we use it in showers and baths all the time. So surely tile floors don’t need moisture mitigation put in place?
Well, not quite. While ceramic tiles may themselves be prone to limited damage from water, a tile floor is certainly not immune to damage from moisture vapor emissions.
Changing trends in tile installations, such as larger format tiles and the ever smaller size of grout joints only exacerbate the potential problems. These trends mean there is less space for the moisture under tile installations to escape through the grout joints. The higher the moisture in the slab, the higher the chance of efflorescence. Using a moisture mitigation system underneath a tile installation can prevent you from responding to costly and time-consuming call-backs from your customers.
10. The resilient adhesive that goes up to 99% RH is going to protect the floor and block moisture.
High moisture adhesives can be a great solution to fast-track construction. However, most of these adhesives are simply tolerating the moisture, not actually blocking it from reaching the flooring. The flooring may not be able to handle the same moisture levels as the adhesive. In these cases, a moisture mitigation system should be used to prevent the floor from failing.
Work With TEC
Contact us for more information on how we can help your business, or discover where you can buy our products across North America.