New High-Flow Self-Leveling Underlayments Offer Labor Savings

Generally speaking, there are two types of self-leveling underlayments (SLUs): traditional and high-flow technologies. The most noticeable differences between the two are the flowability and the smooth surface profile of each product.
Some installers prefer the attributes of traditional SLUs because of the known working properties and their past success. However, these traditional products often require sanding to get rid of high spots where the pours didn’t quite heal together perfectly or a coat of patch, which is anything but fast. The shorter healing time of these products offers less flexibility in the application process, leading to additional steps before flooring can be installed.
The high-flow SLUs offer extended working time and a long heal time but can cure in as little as two hours. The surface profile is much smoother than the traditional SLUs. This allows installers to skip the sanding or skim-coating step that is typically used for traditional self-levelers. In addition, with some formulations, you can install flooring in 15 hours versus the 24 hours needed for the traditional products.
The job scope will dictate which product technology should be used for installation.
- Traditional SLUs work best for deeper fill applications — those greater than 3/16”.
- Newer technologies are ideal for thinner applications — and some products even claim there is no limitation on thickness. (However, you should always check the manufacturer’s label and product data sheet to ensure compliance.)
No matter what type of SLU you choose, the following guidelines can help ensure a successful installation.
1. Select a Product Appropriate for the Installation

Know your installation environment and familiarize yourself with the relevant ASTM standards for strength. A commercial floor subject to heavy rolling loads will require a higher-grade self-leveling underlayment than a floor in a single-family home.
Also, it is critical to understand your project timeline and choose a product that fits within the schedule. Some products may require 24-48 hours to cure prior to installing floor coverings, while other, more premium products are ready to accept moisture-sensitive floor covering in 12-16 hours.
Consult product data sheets for information on tensile strength, compressive strength and flexural strength, as well as recommended cure times. We recommend our Level Set® 300 Self-Leveling Underlayment for a great option that provides a flat, extremely smooth and durable surface.
2. Know Your Substrate
Most SLUs require that all surfaces are fully stable and structurally sound prior to the application. For example, understanding your existing substrate porosity is critical to choosing the proper primer. (A simple water droplet test will determine the surface porosity per ASTM F3191.)
Equally important to know is the make-up of the existing substrate. For example: Typically, sound concrete requires a single coat of primer. Unsealed Gypcrete may require additional steps, including multiple coats of primer prior to the application of cement-based self-leveling underlayment.
3. Prepare Your Substrate
Make sure to plug all floor openings, gaps and cracks and install termination dams to prevent any seepage. Consult with product manufacturers to determine moisture limitations of the floor covering, self-leveler and adhesives to determine if moisture mitigation is needed.
If moisture mitigation is required, this must be done prior to the installation of the self-leveling underlayment.
SLUs require the use of a primer prior to installation. Failure to use product recommended primer may result in installation failure.
Primer retains the moisture within the self-leveling underlayment to allow proper curing. It also acts as a bonding agent to ensure the SLU bonds properly to the substrate. Refer to the primer label for information regarding application methods and dilution per ASTM F3191.
Beyond priming, most self-leveling underlayments require that the substrate is free from any contaminants that may inhibit bond, including adhesive residue, sealers/curing compounds, oil, grease, loose or peeling paint or other contaminants. Polished underlayments will require epoxy primers and/or a specific Concrete Surface Profile (CSP), and in these cases, mechanical abrasion (shot-blasting), is required.
4. Proper Water Demand

Mix your self-leveling underlayment within the water range specified on the bag. Overwatering will lower the strength of the underlayment and may cause cracking and debonding. Additionally, a white film may form on the surface of the cured underlayment if the product is overwatered.
Failure to properly mix the SLU may make it difficult to work with and lead to improper flow, cracking or an irregular surface. Mix a minimum of two bags at a time when barrel mixing to ensure optimum efficiencies during the application process.
In addition, some high-flow SLUs can be pumped. If pumping, special attention is needed to maintain proper water ratios and prevent overwatering. Follow equipment and product manufacturer’s recommendations when pumping self-leveler.
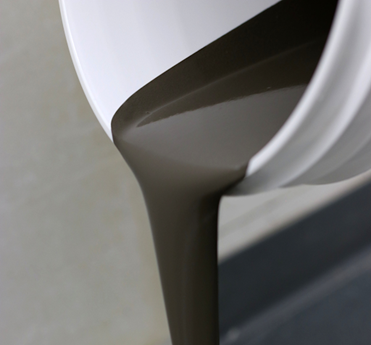
High-flow SLUs can be poured easily, flowing into corners and hard to reach areas. Additionally, voids are filled with no evidence of divots or surface imperfections the next day.
5. Product and Ambient Temperature
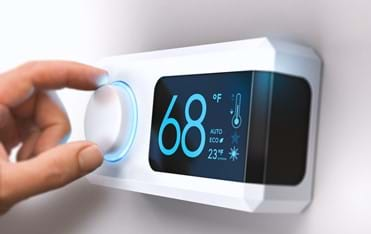
Make sure that the temperature of the room is within the manufacturer’s acceptable range. A climate that is too cold or too hot can affect the product, such as increased set time in cool temperatures or reduction in heal time in hot environments. No matter which type of SLU you choose, temperature and humidity will affect flow, working time and set time.
Additionally, the temperature of the powder and the water is crucial. Leaving product in the sun, or in a hot environment, may lead to flash setting. In situations where warm product is unavoidable, mixing with cold water may help combat installation issues. To maintain cold water temperatures in hot conditions, use blocked or bagged ice in your water barrel.
6. Use as Recommended

Manufacturers will specify the maximum thickness of their products. Some products allow for the addition of aggregate (pea gravel) to increase the depth of the pour, while others only allow their product to be used neat.
Be sure to use the appropriate aggregate size and amount when extending a self-leveling underlayment in a single pour. Two separate pours or multiple lifts will achieve the target thickness without the use of additional aggregate.
Once the SLU from the first pour becomes a walkable surface, you may proceed to apply the proper primer coat for the additional pour or lift. If a surface is extremely uneven in isolated areas with depressions greater than ½” deep (birdbath), you may treat these areas independent to the final pour.
This will assist with the application process by using a consistent amount of self-leveling underlayment throughout the application. Always consult with manufacturers to determine the most suitable product for your application.
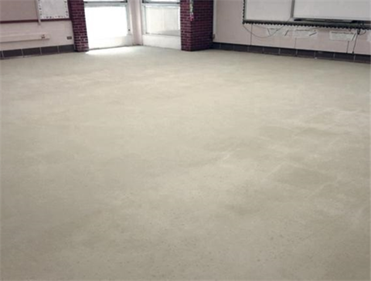
7. Protect Your Freshly Poured Underlayment
All self-leveling underlayments should be protected from direct air movement (drafts) during the initial curing process as they may cure prematurely which leads to cracking.
Generally, most underlayments are not considered final wear layer surfaces. During the final curing process (2-24 hours) they should be protected from excessive construction. Traffic without protection can lead to gouging and irregular surfaces. Allow the SLU to cure completely to prevent any unnecessary surface damage, prior to the floor covering installation.
A common theme connects these successful self-leveling underlayment application guidelines: noting and adhering to the manufacturer’s instructions. You must read labels and product data sheets carefully to ensure products perform as desired.
With multiple underlayment options available today, you are sure to find something that works best for your needs. Click here to see all of our self-leveling underlayment offerings. Or click here to contact us and discuss your specific needs.