5 Keys to a Winning Bid for Gauged Porcelain Panel Installation
Today, we’re seeing a growing number of commercial and large residential projects include Gauged Porcelain Tile Panel (GPTP) installation. That’s because floors and walls with these panels offer a sleek, modern look that appeals to designers, architects and owners.
If you’re a tile contractor, these projects can be a great way to grow your business. But if you haven’t bid on a GPTP installation project before, you need to know exactly what makes it a completely different type of job to estimate, plan and install. You might win a job with a low bid, but it could end up costing you a lot of time and money if you haven’t estimated it properly.
Here at TEC®, we are a leading provider of technologically advanced grouts, mortars and surface prep products to the commercial and residential construction industry. We have several mortars designed specifically for these types of panels, so we’re happy to share with you our 5 Keys to a Winning Bid for Gauged Porcelain Tile Panel Installation.
1. Gauged Porcelain Tile Panels present big challenges
- Size. Panels qualify as GPTPs if they are 3.5 – 6.5 mm thick (1/8"-1/4"), and the size can go up to 5' X 10'.
- Crew. Don’t underestimate the need for added manpower to work with GPTPs. You’ll need a minimum of three people for a GPTP project – many contractors schedule four or more people – and don’t underestimate the total man-hours needed.
- Lifting. Teamwork is important for lifting GPTPs- be sure to provide even support for the panel while carrying or putting in place.
2. Inspect your location
The massive size of the panels means that you need to plan every detail from the moment they arrive on site.
- Delivery and storage. Determine exactly where panels of that size can be delivered. And if you’re not installing them that same day, find a secure place where the panels be stored safely and conveniently.
- Route. Take a walk along the exact route the panels will need to travel to get to the job site and look for any obstacles.
- Hallways and stairs. Make sure the hallways and stairways are tall and wide enough. Look for any tight corners. You might only be able to carry one panel up the stairs at time, so that means your bid has to allow for that extra time and labor.
- Elevators. GPTP panels sometimes can be too large to fit into available elevators, so you need to know your options upfront.
- Other people. Find out if other trades are working in the building that day and if you have to work around them. Also, public traffic might be a concern.
- Power and water. You’ll need access to both.
3. Invest in the right tools
GPTP projects simply can’t be done without a number of special tools. Consider the expense as an investment in getting new and profitable business. In addition to your normal tools, here are some other things you’ll need.
- Forks and extended forks. GPTPs come in oversized crates, so you’ll need either 44” or 96” forks for unloading.
- Suction-cupped frame and racks. Get suction-cupped frames and racks specially designed for GPTPs.
- Large table. Have a heavy-duty table on site that can support the entire panel with plenty of clearance on all sides.
4. Learn the surface prep and substrate requirements
Before you bid on a GPTP project, take the time to review the strict set of requirements for wall, ceiling and floor substrates set by the IRC (residential) and IBC (commercial). Go to ansi.org for complete info, but here are some tips to remember.
- Wood frame surfaces. GPTP panels can never be bonded to a wood frame surface.
- Clean, dry, bondable. Substrates must be clean, dry, bondable surfaces and conform with IRC/IBC standards, or with local building codes.
- Walls and ceilings. Learn the requirements for backer board and panel wall substrates as well as concrete and mortar beds.
- Floors. Only bond to clean, stable concrete floors and cured bonded and unbonded mortar beds.
5. Troweling is different for GPTPs
GPPs demands special troweling techniques that are best learned through practice, but here are a few keys.
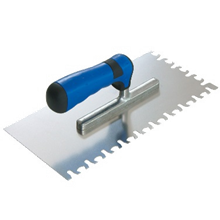
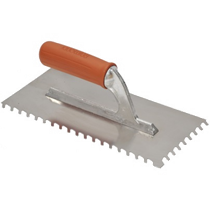
- Slant notch or Euro notch trowel. Only use a slant notch or euro notch trowel because it creates ridges that are designed to collapse on their own.


- Best mortar for GPTPs. Go with a “pseudoplastic” mortar that provides excellent coverage, is easier to trowel, and has fast recovery time for no slip/no slump. (Ultimate 6 Plus Mortar by TEC is your best choice.)
To further help you, ANSI came out with new standards specific to Gauged Porcelain Tile Panels.
There’s no substitute for hands-on training and experience with GPTP installations, but these tips will help you prepare more complete bids as you go after this exciting new business.
As always, remember that TEC is here to provide the highest quality products to support tile professionals like you.
